
Recently I finished painting my newest pantry shelves. The
shelves were a combination of new and used wood.
When we purchased our small farm the kitchen had a 3’ by 4’ pantry closet, (with 6 inch wide shelves, ugh) and later I converted another closet for more pantry space. But last year we did a complete kitchen remodel, going down to bare studs so I had to build a new pantry.
When we purchased our small farm the kitchen had a 3’ by 4’ pantry closet, (with 6 inch wide shelves, ugh) and later I converted another closet for more pantry space. But last year we did a complete kitchen remodel, going down to bare studs so I had to build a new pantry.
I use a pretty basic shelf design which can change slightly
depending on the character or purpose of the shelving.
Storage shelves are more rustic and not always
“perfect”.
Book shelves get a little added trim and detail work and are
put together with better wood and more attention to ascetics.
Looking through photos of shelves I have constructed in the past made me realize I am sort of obsessed with shelving. But in my own defense, I just think you can never have enough! If this is not something that rings a bell with you, try to compare it with “not enough shoes” or “never enough chickens or pets” or something similar. I also have an issue with books so have to keep building shelves!
 |
| Closet converted to pantry storage before Kitchen remodel |
Anyway, after skimming through photos, I’m started feeling
like Sarah Winchester and the Winchester Mystery House. She is the woman who
continually built rooms onto her house that she never used! OK, I’m not that bad! I am using all my shelves.
Since purchasing our house I have built storage shelves,
book shelves, laundry room shelves, garage shelves, gardening shed shelves, closet
shelves and shelves for three pantries!
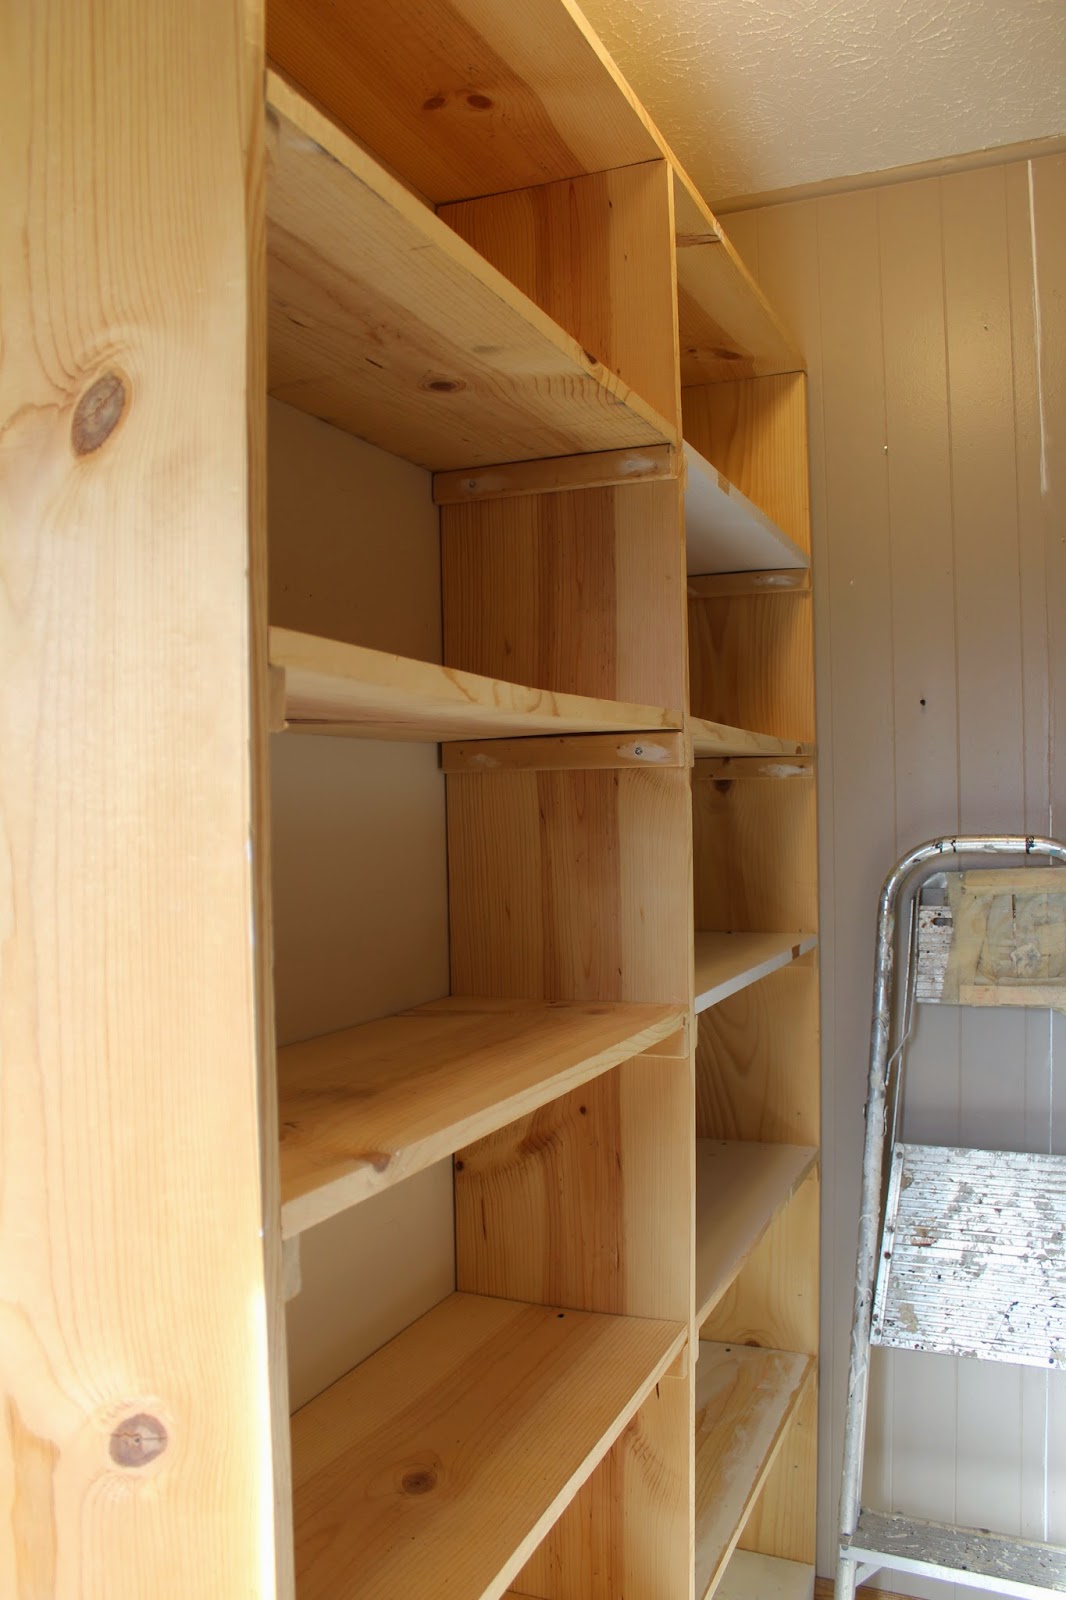
For this final pantry (yes, I am done building pantries!!) I
had most of the needed supplies. I do
not like to throw away wood, so a lot of the wood for this project was leftover
from the kitchen remodel or the old pantries.
 |
| Outside 8 ft pine boards with 3 ft shelves |
I started with two 8 feet long by 10 inches wide pine boards
for the frame (or outside boards).
I then attached 1” x 1-1/4” x 10" pieces of the cut board along the 8 foot outside boards. These are the shelf support boards.
I then attached 1” x 1-1/4” x 10" pieces of the cut board along the 8 foot outside boards. These are the shelf support boards.
 |
| 1" x 1-1/4" support boards holding shelves |
I like to use drywall screws, and always pre-drill the
holes. The usual out come of not pre-drilling
the nail or screw holes is splitting the wood.
 |
| Under side view of support boards |
Once the 1” x 1-1/4” x 10” shelf supports were in place I cut and
attached the shelf boards. I intend to
put a lot of weight on these shelves so did not want to make them too wide. Too
much weight without extra support and the shelf will bow. I made my pantry shelves 3 foot wide.
 |
| Front view of outside frame boards, support board and shelf board. |
Besides making them stronger, by making them 3 feet wide I could also just buy six foot
long pine boards and cut them in half.
Once together I secured the shelf board to the shelf support. This keeps the shelf boards from moving and makes the entire unit very stable.
Also, I held the entire shelving unit in place by
running a screw through the shelf unit and into the pantry wall. It is best to find a wall stud to fasten the
shelving unit too so the shelves do not possibly become top-heavy and fall
over!
 |
| The second shelf unit joined with the first. |
I have also used this design to build book shelves when I
remodeled a lower-level room.
 |
| Book shelves in lower level made with the same design but with salvaged barn wood |
I built my storage room shelves (for holiday decorations and
crafts) and cold storage room (Canning Jars) in the same manner, but with a
slight difference.
For the storage room I used 2 x 4’s as the shelf supports
and ¾ inch plywood cut in half long ways as the shelving because of the extra
weight the shelves needed for support. I also used 2' x 4' boards for the sides instead of pine boards.
In the Cold Storage Room I used regular 10 inches wide by 8-foot
long pine boards for the shelves but used 2" x 4"’s for the supports here too. The following photo also shows how I used 2' x 4' boards for the sides instead of pine boards.
 |
| My cold storage shelves for canning jars |
Painting is optional for any storage shelves you build, but
I usually like mine painted. I use a semi-gloss
paint because it holds up better than flat and is easy to clean.
Once my new pantry closet shelves were complete I used paintable caulk to cover
or fill any holes and flaws, nicks or dents in the wood as well as cover up the screw
holes.
Paint and caulk can go a long way to cover mistakes and
imperfections, let me tell you!
 |
| Caulk will cover holes and flaws |
I completely painted all the shelving with one coat of
paint, let it dry overnight, and then did a little touch-up painting and added a
second coat of paint where needed.

 |
| Painted and ready for stocking |
As a last-minute idea, I decided to add a wine rack! Click here for instructions on a simple basic
Wine Rack. (post coming soon)
 |
| Finished!! |

Don’t have a pantry?
Not to worry, any closet or area can be turned into one, and many empty
nesters are turning their really small extra bedrooms into a first laundry /
pantry room.
If space is limited build one
in the basement or garage. Just make
sure there’s an even temperature year-round so jars will not freeze in winter
or overheat in summer.
Building a Chicken Coop
 |
| Lower Level storage room shelves |
ReplyDeleteGood day! I know this is kinda off topic however I'd figured I'd ask. Would you be interested in trading links or maybe guest writing a blog article or vice-versa? My website covers a lot of the same subjects as yours, and I believe we could greatly benefit from each other. If you might be interested feel free to send me an email. I look forward to hearing from you! Excellent blog by the way!
Send me a email with info and address on your blog and I'll take a look and think it over. Thanks for the offer! ohiothoughts@yahoo.com
DeleteI need to do that! Heidi
ReplyDeleteYou're so awesome! I don't suppose I've read through another blog like this before. So nice to find somebody with a few unique thoughts and ideas. These shelves are do-able!! Seriously.. thanks!
ReplyDeleteThanks so much, that's a lot of compliments in one comment! They are very much appreciated! The shelves were born out of necessity and have evolved over time. Glad to know I wrote this up in such a way that someone can follow the directions and want to try to build them. That's what counts to me. Thanks again!
DeleteLove it sis. Kathryn Wright
ReplyDeleteYou always do a great job in all of your projects. I love it. Julie Leach
ReplyDeleteThanks guys love you
ReplyDeleteI want to make something like this for my basement. Kathryn Wright
ReplyDeleteYou actually make it seem so easy with your presentation but I find building things to actually be something which I think I will never understand. It seems too complicated and very hard for me. But having the step by step directions, for the first time I think I may be able to build something.
ReplyDeleteWho doesn't need shelves?! I'm looking forward for your next
building or DIY post, and I'll try to get the hang of it!
Listen, I am no expert. My work is not perfect that's for sure. But give it a try. Make something small and use scrap wood. For me, practice made something acceptable (mine is never perfect).
ReplyDeleteAnd thanks for the encouraging comments everyone!