
My previous posts, Tapping Maple Trees and Turning Maple Sap into Syrup details my first year tapping our farm's maple trees.
Here are a few things I have learned:
Spiles (tree taps)
There are many types of spiles (tree taps) you can use. Some are made of a thinner metal, (the ones I purchase from Tractor Supply last year) and some are made of a thicker and stronger material. Most spiles have hooks for hanging buckets, but some also have a metal lip on top to hold the bucket handle or metal sap bag holders.
I like the heavier spiles I purchased used from Slate Run Farm last year and the new ones I purchased this year from

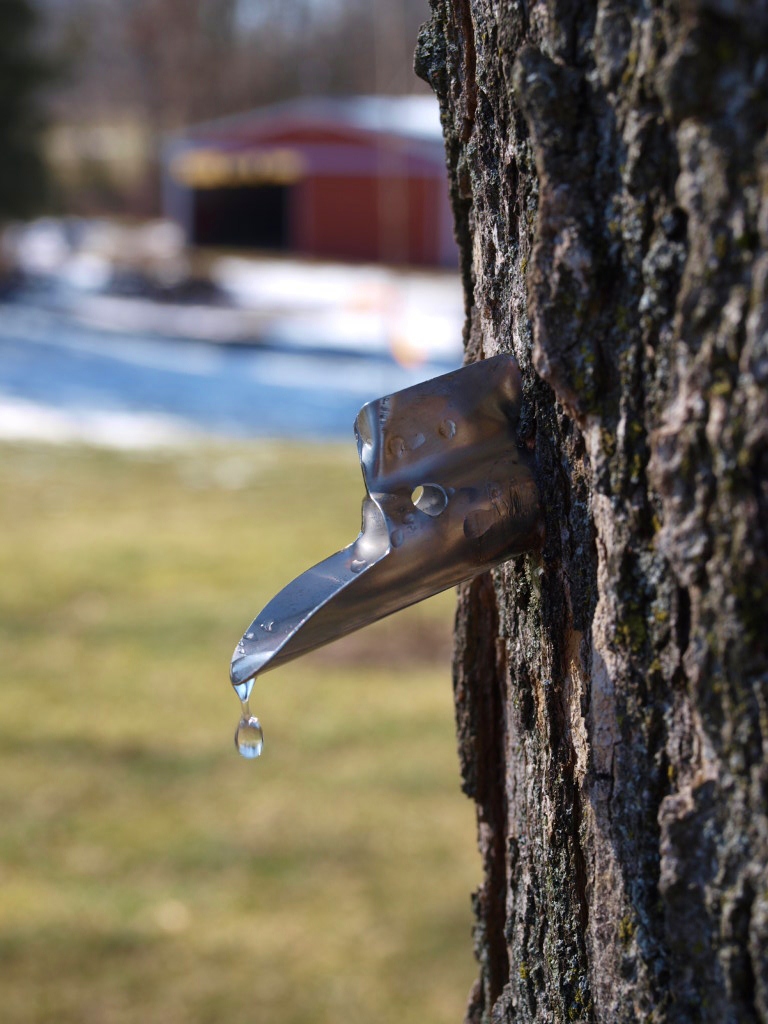
The thinner spiles seem to bend easily when tapped
into the tree with a hammer. (see above left photo)
I have found the cost for the heavier spiles compared with the thinner metal spiles to be the same.

SAP BUCKETS:
Of buckets and sap collectors, the selection is endless!
Here are a few I have tried.Milk Cartons:
The cheapest method is a milk carton. I have used these myself. The benefit of using a milk carton is the price: zero, and the sap can be stored in them until you collect enough to boil. Just screw on the cap and store in the refrigerator.

A draw back to using milk cartons are aesthetics, they just don’t “look” nice hanging from the maple tree. That aside, the biggest problem is their weight. Because they are made of lightweight plastic, they are easily blown around by the wind, away and off the spile, which causes a lost of precious sap.
Glass Canning Jar
These are not practical. The jars fill up way too fast causing
lost of precious sap and it's hard to pour the sap into the collection buckets. Using a glass canning jar was purely for a
photo opp on my part. I just loved the
look of it from another blog, so had to set the photo up for myself. 
Plastic Buckets:
I have also used inexpensive buckets, the 2 gallon mop bucket model from the Dollar Store. These look much better than milk cartons, (mine were black) but the handles did not hold up under the weight of the sap. I finally removed the handle and drilled a hole into the side of the bucket, a few inches below the rim and then used heavy wire to make a loop to hook the bucket to the spile.

I also purchased heavier 2 gallon plastic buckets with lids
from our local home improvement store. I
cut a hole into the lid to allow the sap to drip into the bucket. These are working very well. The cost including the lid is around $4.00
each.
5 gallon plastic buckets can also be used, but I worry
about the weight of the sap pulling the spile out of the tree if not monitored
closely.Metal Buckets
My favorite is the traditional metal bucket. They’re what I picture in my mind, in a Vermont Sugar Bush with red checked jackets, wood fires burning and pots boiling.

But, they are probably the most expensive of the sap
collectors. A galvanized bucket runs
anywhere form $10 to $15.00 each from our local home improvement store. I have only one authentic sap bucket I picked
up from a sale a few years back. It
makes for very nice sap collecting photos.
Metal Sap Sack Holder
These are a new method for me this year. They hold heavy plastic bags and hang from
the metal lip on the spile. They are
easy to use, and easy to pour the sap into collection buckets. The only thing I do not like is the bright
blue bags, but again it’s just the romantic side of me that longs for a picture
perfect Sugar Bush. They were
inexpensive at $2.75 each for the metal sap holders (I purchased them used) and
25 cents each per new blue plastic sap bag. My daughter Alexis shared a video she found on YouTube of the O'Brien Family Maple Syrup Farm, using these metal holders and sap bags. 
OTHER TOOLS
Hydrometer and Cup
The most valuable things I have added to my Maple Syrup
making supplies is a syrup hydrometer and a hydrometer cup. These have made it much simpler to determine
when the sap is ready and when it has actually reached the consistency of
syrup! The person who invented these was a genius!

I purchased both online from
The hydrometer cup was $15.00 and the hydrometer was $26.00,
the most I have spent on any Maple Syrup supply so far.
Dehydrator or Boiling Containers
Last year I had two large round pots to boil down the sap.
This year I found a large square pan to use along with one of the round pots from last year.

The larger the surface area of the pot the faster the water will evaporate from the sap, cutting down on the time spent boiling. Just switching to this new larger surface pan has noticeably cut down on my boiling time.
My goal is to have a large evaporator like this one, from Slate Run Historical Farm!

2013 Maple Sugaring is proving to be a good year, the sap is running well and the syrup is turning out a beautiful golden color. I'm much better at it this year than last.
And just this morning we had pancakes covered with my new syrup, yum.

Hope you have a wonderful sugaring season!
Elizabeth
Homemade Waffle Recipe
Malabar Farm Sugaring Festival
Tapping Maple Trees
Turning Sap Into Syrup
"He willed that there shall be growing forests in which there shall be certain trees
from which sap shall habitually fall in its season.
So, too, let us give thanks because there still grows here and
there maple trees, for we can look upon maple sugar".
~Address of thanksgiving to the Powers of the Master of Life (Green Corn Dance)
"I have never seen a reason why every farmer should not have a sugar orchard,
as well as an apple orchard. The supply of sugar for his family would require
as little ground, and the process of making it as easy as cider".
~ Thomas Jefferson, Letter to M. Lasteyrie, July 1808
.
.
I am the best sap collector! I have to taste-test the sap everytime I collect it! Very delicious, and magical!
ReplyDeleteAlexis: The whole process of sap collecting and making it into syrup is all a very magical thing and has deepen my love of maple trees, although we were tight before......
ReplyDeleteHello, Neat post. How cool to make your own.
ReplyDeleteThanks. It's time consuming but well worth it.
ReplyDeleteThank you for sharing with us, I believe this website really stands out :D.
ReplyDeleteKeep on writing, great job!
ReplyDeleteWe stumbled over here from a different page and thought I may
ReplyDeleteas well check things out. I like what I see so i am just following you.
Look forward to exploring your web page yet
again.
Okay....my maple sap tastes a little like plastic...I am using a blue sap sack. Anyone else have this issue?
ReplyDeleteIs it just my imagination or does the blue sap sack make the maple sap tastes like plastic?
ReplyDelete