 |
| Tobacco Barn July 2014, exterior repairs finished |
Our little farm was once a much bigger property with a white
clapboard farm house, a hand well pump and many outbuildings and barns. The original old farmhouse burnt down in the
1950’s and the property set neglected for many years.
In 1967 the property was divided up and sold at auction. A builder bought the current property and built a custom brick ranch on the exact spot where the old white clapboard farm house used to be.
The new house overlooked a large pond and pastures. He also built a large pole barn and raised cattle.
After 25 years, the builder divided up the property a little
more and sold more land and then sold the house too. The second owner stayed for approximately 20 years. While here he drained the pond and built
another pole barn for horses. We are the third owners.
Somewhere along the way many of the original outbuildings must have decayed, so were removed or torn down. We have found old foundations, antique bottles and old farm tools while digging and planting.
But lucky for us, one small barn has lasted through all the
changes; the original chicken coop. We
call it the Tobacco Barn because of the painting on one side.
 |
| The Tobacco Barn in desperate need of repair |
The Tobacco Barn was nearly past saving when we purchased the property, and according to many WAS past saving because it was in such poor condition. The remnants of old nesting boxes were still in place but termite eaten and the barn was full of junk, rotting boards and trash from years of neglect.
 |
| Interior condition of the Tobacco Barn before repairs |
I converted another building into a chicken coop, but I am somewhat of a romantic and can just feel the past years of joy this little barn provided for the original farm. I can picture in my mind’s eye the old farm wife going out early each morning to collect eggs and talking gently to her hens. I just really really wanted to save this little building.
One of the previous owners, thank goodness, had braced the outside back wall of the little barn with large beams and added support beams to the inside. It’s very likely those support beams saved the barn.
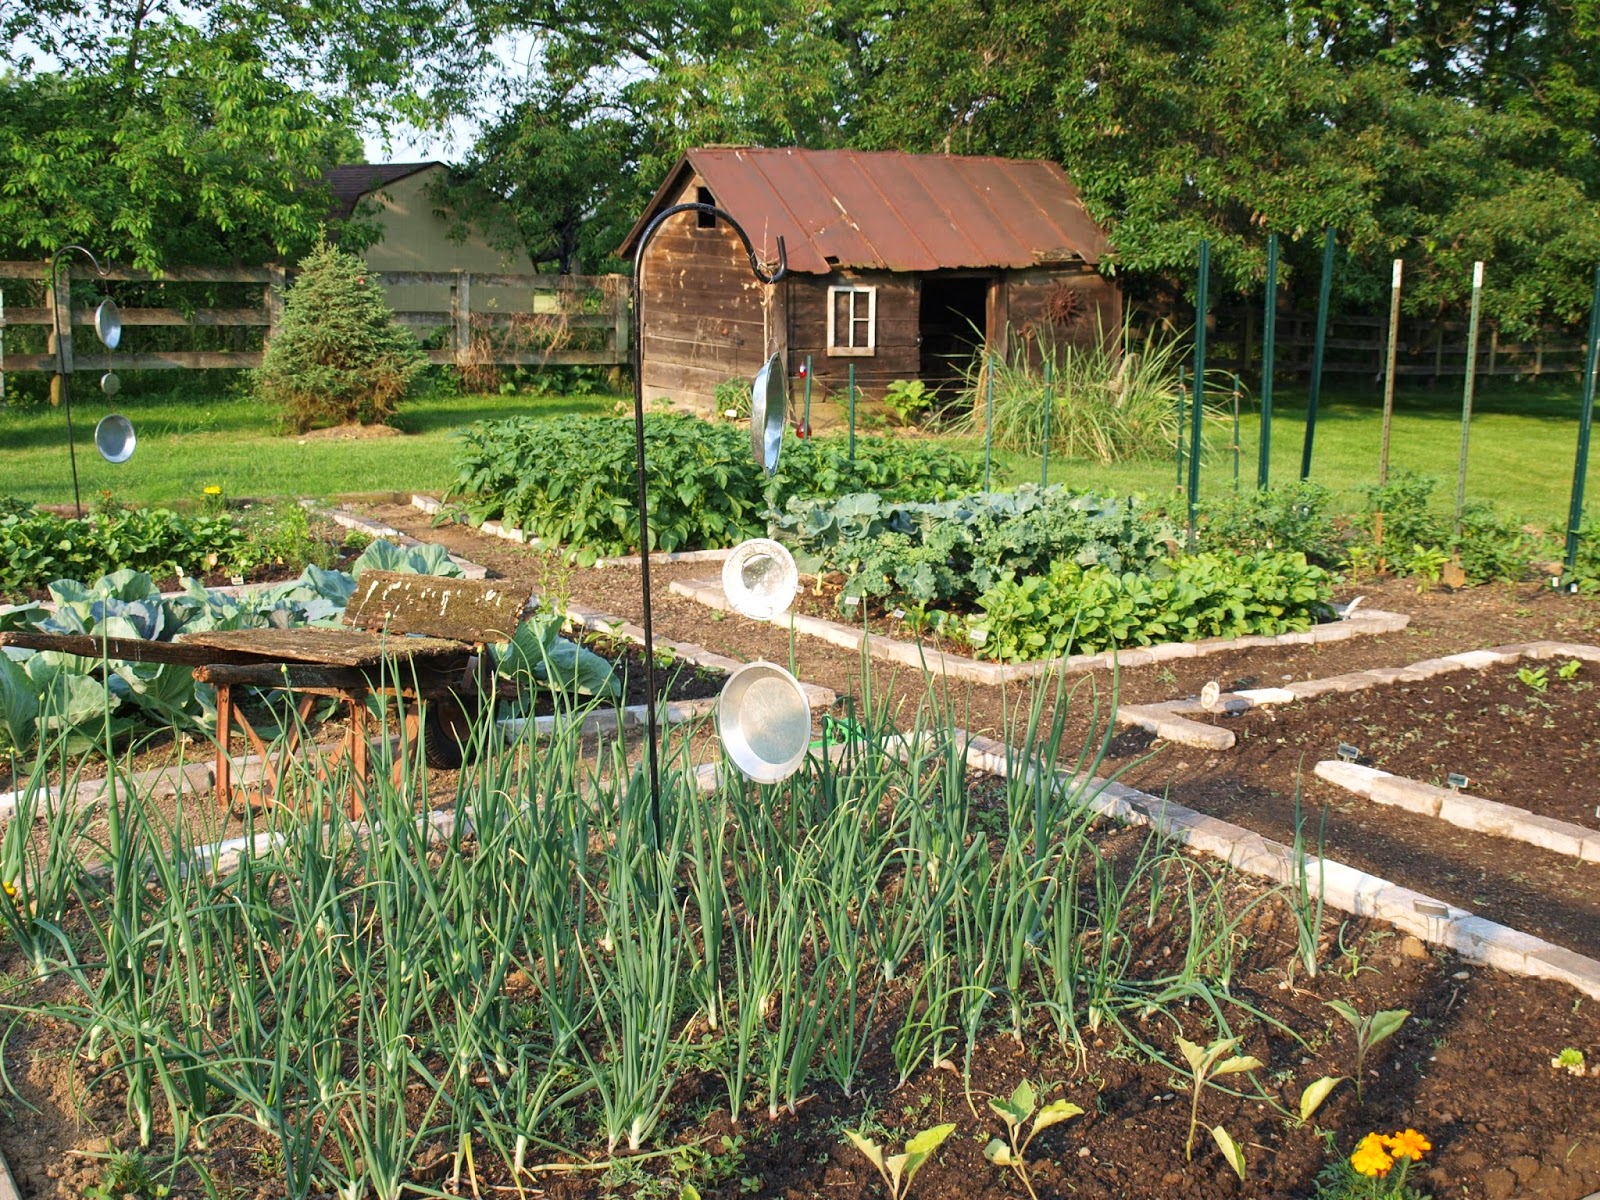 |
| The old Tobacco Barn as backdrop for my vegetable garden |
The bottom frame of the structure was completely rotted and gone and all the wall studs had rotted so much so that the barn was short and leaning terribly.
Our first step was to shore up the entire building, add a bottom
frame and install new studs all the way around.
 |
| The support beams that kept the little barn from falling |
We also wanted to move the Tobacco barn just a little, and because of needed repairs we had to remove all the added support structures. The scary part? We didn't know if the whole barn would fall once the supports were removed, yikes! It did not fall!
We used a car jack to raise the Tobacco barn up enough to
install cinder blocks all the way around the base.
This gave us enough room to attach new studs to the old oak studs, raising the barn by about 12 inches. We also tried to straighten out the lean as best we could, raising one back corner a little higher than the rest.
 |
| We raised the barn off the ground so we could rebuild the frame. |
This gave us enough room to attach new studs to the old oak studs, raising the barn by about 12 inches. We also tried to straighten out the lean as best we could, raising one back corner a little higher than the rest.
After rebuilding the bottom frame and attaching new studs to
the old, we used the jack to again raise the building a little at a time all the way around and remove the cinder blocks.
Then we lowered the building a little, rolled large PVC pipes underneath and then lower the barn onto the pipes.
Then we lowered the building a little, rolled large PVC pipes underneath and then lower the barn onto the pipes.
 |
| Resting the barn on PVC pipes for moving |
Using the PVC pipes allowed us to move the barn to a more desirable location, (only about 8 to 10 feet over to the right and closer to the pasture fence). We wanted to hide a satellite dish from view.
 |
| We moved the Tobacco Barn on PVC pipes |
Once we had the barn in the desired location, we again raised
it enough to build a foundation underneath.
For the foundation, we decided to use treated railroad ties. The ties have a distressed look and are black
so would blend well with the barn. We
did not secure the railroad ties together just yet. Once the foundation was in
place, we slowly lowered the barn onto the foundation.
 |
| Setting the Tobacco Barn on top of railroad ties |
That took some maneuvering!
Because the little barn had rotted and was leaning so much
it was not perfectly square. The railroad ties had to be moved around, slightly right or left, to allow the barn base frame to set squarely onto of the ties. Once the barn was setting on
the foundation, we attached all the corners and sections of the railroad ties
together with metal brackets. We then secured the barn to the railroad ties
by screwing the barn’s new base frame to the railroad ties.
 |
| Securing the railroad ties together for the foundation |
Many boards on the outside had to be replaced or new added. The door frame had to be rebuilt and a temporary door installed to keep out the elements. The door I installed was salvaged from an
old 1800’s barn. I also installed a small window just to give the Tobacco Barn a little character. Real working windows will be installed at a later date.
 |
| Temporary window added for character and the door frame rebuilt |
Later in the year we had a new metal roof installed, completely removing the old rotted tin roof. The old tin I am saving for some other project, possibly as the roof for a small pig shelter. I try not to let anything go to waste around here.
 |
| New metal roof being installed |

The next steps of restoration will be to add working windows, build a floor out of salvaged bricks and finish the inside walls, using feed sacks as the barrier/insulation. I also want to install a bed frame and add electric. Landscaping has begun, but I want to add an herb garden to the left of the Tobacco Barn, with maybe a little walk and a seating area.
 |
| How the Tobacco Barn looks so far. This photo taken July 4th weekend |
I have different ideas for what the purpose of the Tobacco
Barn will be: Maybe a camping cabin with
a bed and small pot belly stove. Maybe
the sugar shack I need for my maple syrup making. And my son really wants a smoke house. The Tobacco Barn may be a combination of all these
ideas.
Elizabeth
Other Farm Related Links:
Building a Chicken Coop
Maple Syrup Making
Starting a Chicken Flock
Keeping Goats
Additional Photos:


Other Farm Related Links:
Building a Chicken Coop
Maple Syrup Making
Starting a Chicken Flock
Keeping Goats
Additional Photos:
First off, thanks for the blessing, I will take all I can get. And the compliments, those too, : ) Now about which platform to use: Wordpress and Blogger are debated back and forth on many websites and blogs as to which is better. I use Blogger because it's pretty easy to use and I can use my own template and colors scheme. Browse the internet and at look a different blogs using both platforms and decide which one you like the best. Also do the same for writing style and blog appearance to help you decide how you want your blog to look and what you want to write about. Good luck and send me a link when you get it up and running!
ReplyDeleteWhen I originally commented I clicked the "Notify me when new comments are added" check box and now each time a comment is added I get three e-mails with the same comment. Is there any way you can remove me from that service? Thanks a lot! Christian
ReplyDeleteOops, sorry about that. I'll check to see, maybe it got clicked multiple times? I'll see what I can do.
DeleteSo glad to see someone keeping and restoring old farm buildings. Seems as soon as a new owner purchases an old farm they take down all the old barns full of history. Great job on the restoration and looking forward to what else you have done. Earl Scantly
ReplyDeleteEarl: We have found remnants of other old structures like foundations, but those barns are long gone. Glad we still have this one!
Delete
ReplyDeleteThis is a topic that's near to my heart... Many thanks! Where are your contact details though?
My contact info is on the top right column. Or like us on Facebook under Lynch's Mt. Horb Farm!
ReplyDeletePlease let me know what I need to rebuild a old chicken coop so I have it ready by next spring
ReplyDeleteAnonymous, congrats on deciding to raise chickens. They are warm and friendly and easy to care for. Some are smarter than others and will become attached to you, just as you become attached to them. I'm not sure what you will need to rebuild your chicken coop but it needs to be secure so nothing can get in and kill the chickens. The coop doesn't necessarily need to be insulated unless you live in an extremely cold climate. Chickens do need a roost to sleep on and you may want to put in a window for ventilation during warm summer days. I put wire screen over my coop window so it can be left open night and day. The chickens will need an area to free range (outdoors) that's safe from predators. You'll also need water containers, feed pans, dirt for dust bathing, and maybe a heat lamp for really cold days/nights. When the chickens are young you can train them to go into the coop each night, then they will do it on their own. If the chickens can not free range around your property, build a scratch yard for them, which is an outdoor area. The coop doesn't need to be cleaned everyday, but as the waste piles up under the roost, it should be cleaned often. And chicken poo is great for the compost bin and adds nutrients to garden soil. You will need to have nesting boxes for egg laying which also should be kept clean. A rooster is a great addition to the flock and he'll be your first defense against predators. A rooster will risk and give up his life to protect the hens. You do not need to have a rooster for the hens to lay eggs, but I myself would not be without a rooster.
ReplyDeleteI hope this helps, let me know if you have any other questions.
we bought a home with a chixken coup that I want to use as a sheshed. Any ideas on how to get the smell out.
ReplyDeleteThoroughly clean and bleach the walls and floors. Then use a sealer and primer before painting.
Delete