Small Pantry Wine Rack
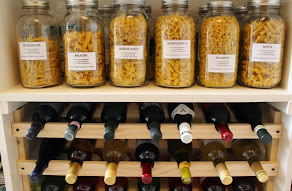
Last year we remodeled our kitchen, which took nearly a year. And while at it, I also build a new pantry.
When I built the pantry I didn't paint it right away because summer was fast approaching. Instead, I filled the shelves and waited for colder winter months.
So last month, while the snow was flying I decided to paint the shelves. And while the shelves were bare, I came up with the idea to build a wine rack.
This wine rack is a simple design and easy for just about
anyone to build.
Supplies I used:
Pine 1 x 3 and 1 x 2 boards
Saw
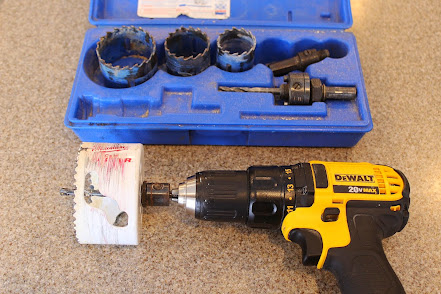
Hole Saw Kit
Cordless Screwdriver
Tape Measure
Pencil
Level
Drywall screws or nails
Drill bit
Sandpaper
Paint or stain
 |
| Hole Saw kit and cordless screwdriver |
One of the best gifts my husband has given me is the DeWalt drill set. We have had Milwaukee and Porter-cable brand drill sets, but this one is the best yet. My nephew Sammie has the same set and I fell in love with it. It's lightweight but still has just as much if not more power than the older bigger sets we have. And the batteries are better, last longer, and are easy to remove.
How I made it:
The wine bottle’s neck and bottom will be resting on a piece
of wood that has a half-circle cut-out. So the first step is to determine what
size hole saw is needed to make the cuts.
I measured the bottom of a wine bottle which is a little less than 3
inches across. So for that cut-out, I need at least a 3” hole saw.
I then measured the neck of the wine bottle to determine the
size hole saw needed.
This I did by just placing a hole saw over the neck of the
bottle.
I used a 1 x 3 piece of wood for the bottom of the wine
bottle to rest on and a 1 x 2 piece of wood for the neck of the bottle to rest
on.
I am building the wine rack right into a pantry shelf, so I
cut the length of the boards to the width of the shelf.
The width of the shelf I am building the wine rack into is 30
inches wide so the boards were cut 30 inches long.
After figuring out how many racks I could fit into the shelf
(3) I cut all the boards needed, 3 – 1x 3’s and 3 – 1 x 2’s. Now to determine how far apart each wine
bottle will be from each other. The
widest part of the wine bottle is just under 3 inches so I decided to make the
cuts every 4 inches.
I can fit 7 bottles of wine on each rack, leaving 1 inch of
space on each side, (30 inches divided by 4 inches is 7, leaving 2 inches over).
I made the first cut mark at the middle of the board, then
measured 4 inches from the center and made a mark for the next cut, and so on.
The cuts should be started at the center of each mark.
The same procedure is done for all the boards of the wine
rack.
Once all the boards were cut, you may need to lightly sand
the rough edges with sandpaper.
Once sanded, install them into the shelf. I used 1 x 2’s of wood cut the height of the
shelf, then secured to the sides of the shelf.
These will be the support boards and what the rack boards will be
attached to. Make sure each rack is level when installing.
You may want to pre-paint the wood before installing it.
 |
| Racks attached to 1 x 2's for support |
I used drywall screws because my wine rack will be painted
to match my pantry shelves, and I can cover the screw holes with spackle.
You may want to use nails if you plan on staining the wood.
 |
| 3 levels of racks installed |
Make sure to make the racks far enough apart so the wine
bottle can be easily removed.
Also, it is always a good idea to pre-drill the screw or
nail holes. Believe me, I have split my
share of wood when I did not pre-drill.
 |
| Wine rack complete and ready for paint |
Other Blog Posts:


What a wonderful idea for wine storage and great display of your pantry items!!! So nicely done. Jane
ReplyDeleteThanks!
DeleteHelpful blog post but I just wish I had seen it before purchasing a wine rack. May still try to build one and take the other one back, lol
ReplyDeleteIt's pretty easy to build and as long as you can cut the half circle cuts for the bottles to rest in I'm sure you can do it!
DeleteThis comment has been removed by a blog administrator.
ReplyDelete